Thursday, February 28, 2013

Funky Aprons


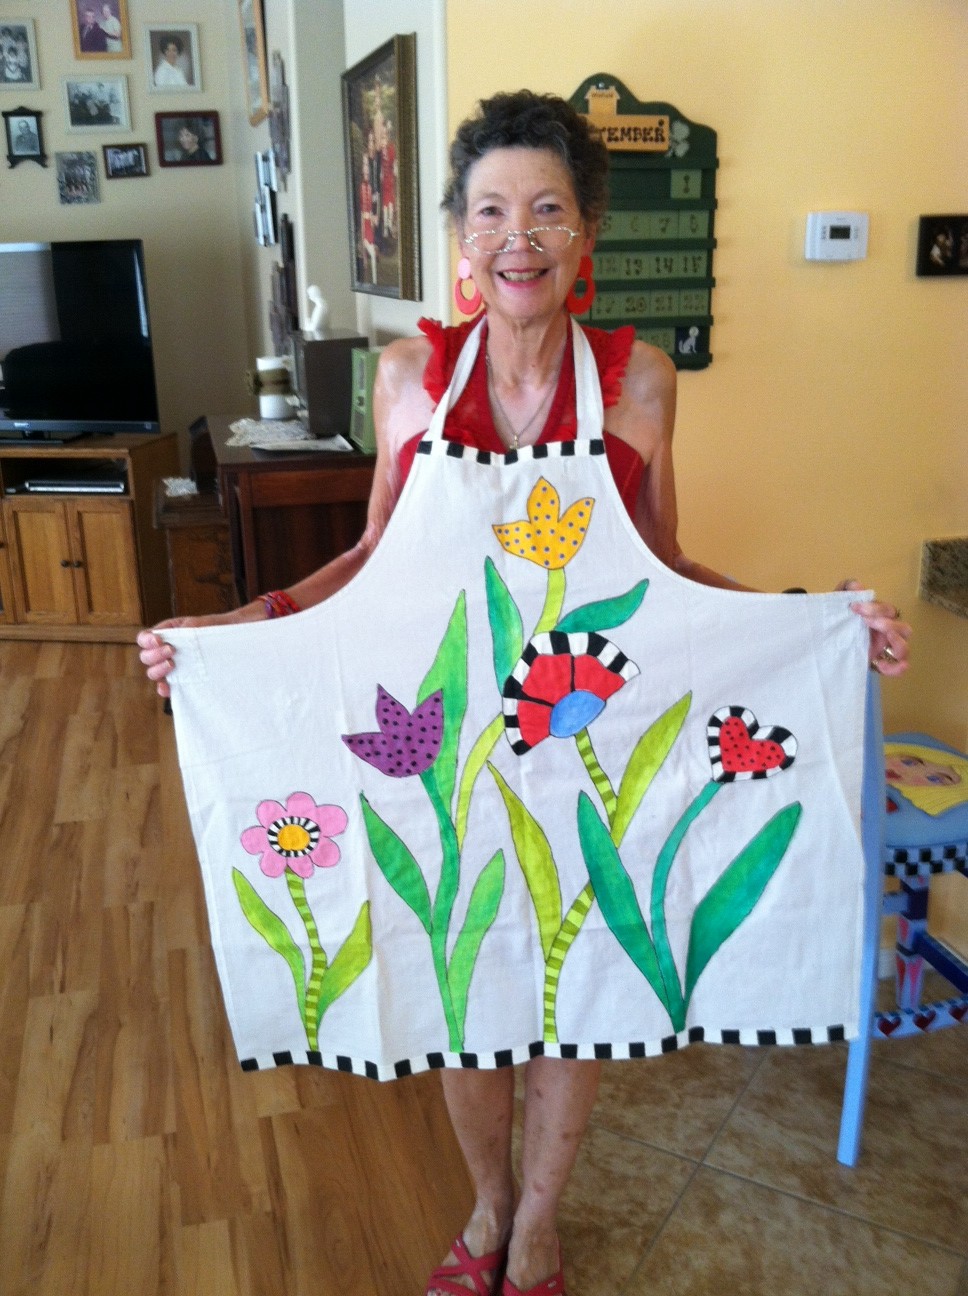
This post is about my continuing journey to more funkieness in my creative work.  Now some people would ( and have said ) is that possible, and my answer is a resounding yes!!!  I have a dear friend in Memphis, who gave me a couple of boxes of vintage linens about three years ago.  When I went through the boxes, I found quite a few long aprons.  When I mentioned it to her, she told me they belonged to her grandfather who was a butcher.  I decided that I would give her a couple of aprons back decorated in some way when I returned to Memphis last fall.  First of all my friend is 5 feet nothing, so I cut about 10" off the bottom.  From that I made the back ties.  I used buttons from the button jar that was also in the vintage linens she gave me to attach the back ties to the apron.  Then I painted both aprons. 

I drew out my designs on paper and transferred the design to the apron by ziz-zaging in small black stitching through the paper onto the apron.  I then painted the design with fabric paint.  After I finished the painting I did another heavier ziz-zag over the first to act as a bold outline.  I really love both aprons, but I must admit to a fondness for the lady.  I love her.  I have been searching for a face and body that would be a signature for me and I think this character is definitely going in the right direction, and the flowers are definitely more free than I have ever been able to accomplish before.  I also will say that these aprons are separated from the chairs about two months and there is a marked difference in the faces that I drew.  I finished by heat setting.

Monday, February 18, 2013

painted furniture

I have not posted anything in several months.  I have lots to share, but I just don't understand my blog well enough, I guess.  My son has been here on a visit and he has helped me a great deal in understanding this blog.  Hopefully, I will be better at how I post.  This post is about some chairs I painted  back in May.  They were blond wood.  I first painted a coat of primer.  Then I painted the chairs and sealed them with a sealer. 


The chair seats I enjoyed doing very much.  I primed the canvas with gesso and then free hand drew the faces on the canvas.  These faces were so much fun.  I have been interested in faces for several years, and feel like they are evolving so much.  These faces are funkier than the ones I have drawn and painted before and I feel so much more confident with them.  Elineor Piece Bailey once told me to PRACTICE, PRACTICE and PRACTICE to develope the skill and that has definitely helped me.  I have come a long way with drawing faces in two years considering at that time I couldn't draw them at all.  I finished the canvas seat covers with a couple coats of scotchguard and so far so good.


These are the finished chairs.  The chairs themselves were alot of work.  The faces not.  I have enjoyed having them at my kitchen counter and have received many compliments on them.  I feel they are add to the funkieness of my home decor.  

Tuesday, May 8, 2012

This post is about IPad covers.  I really like to have unusual items and I really love this IPad cover which can be adapted for the Kindle and the Nook, both of which I have done.  You need to start with a hard back book.  I got mine at our library used book store and the books already had the library book jacket cover on them.  You can buy the library book jacket covers on-line pretty cheap, but it is worth trying your library first.  You cut out the guts of the book at the spine.  Some books are easier to work with than others.  You need to do some measuring so you can cover the inside of the book.  I use fun foam from the hobby store for the padding and it works really well.  You can sew through it and I also used nylon ripstock for the fabric.   I used Aileen's OK To Wash it glue to glue the whole center to the book.  I have found it really works to adhere fabric to surfaces.  The last thing I did was used gromets on the elastic edges.  I feel that is a weak area and needs reinforcement.  The gromets I used were from the Tandy Leather store.  They are finished on both sides and easy to put in. 

This is the view of the Ipad and center of the book cover.


I also put elastic from the front of the book to slide the back of the book. This keeps the whole cover together so it doesn't fall open if you drop it.


One of the great things about these book covers is that your IPad/kindle/Nook doesn't look like  those items.  If you have them sitting on your car seat etc, they look just like a book.  I made a friend a Nook cover and she had it sitting on the a night table in her room.  Someone broke into her home and took almost everything, even things that had no value.  They even took her Nook cord and plug but left her Nook on the bedside table.  She feels they did this because they thought it was a book.  These covers are fun to do.  I love finding cute books to use.

Tuesday, April 24, 2012

Altered t-shirts

I have not posted in a couple of weeks due to what I now call OUR FABULOUS GRANDBABY SPRING BREAKS ROAD TRIP.  When we got back here to the Phoenix Arizona area, we jumped into full hot summer temperatures.  I would like to discuss t-shirts.  We buy them when we visit a fabulous place or city or perhaps a college shirt, but then what about them.  As far as I am concerned, I have never worn t-shrits alot.  They haven't fit in my weather temps, but also, for me, they are just not that flattering.  Perhaps that is true for alot of women.  I have posted what I have done with my t-shirts.  I have made tank tops out of t-shirts.  It is easy, peasy.  Cut apart the t-shirt removing the neck ribbing, and cut across the shoulders and then remove the sleeves.  Use an exsisting tank top pattern cutting the front and back on the fold.  Then cut out the neck and sleeve binding out of the sleeves.  If you don't have enough fabric on the sleeves for the facing, buy another t-shirt at the thrift store of similiar color and use that for fabric.
These tshirts are the ones I altered to tank tops.
     The second thing you can do to t-shirts is to cut out the neck ribbing and replace that with another knit facing.  Again it doesn't have to match, and you can use another t-shirt purchased at the thrift store.  Sometimes just getting rid of a high neck ribbing makes a huge difference in how that t-shirt feels.  Another thing I do is shorten them and either hem them, or add a contrast t-shirt binding. Hopefully these ideas will inspire you to look at your t-shirts differently.

Tuesday, March 20, 2012

altered bustier/bustiere


Gosh, who knew there were two spellings for this fabulous garment. Wikipedia says that bustiers are traditionally worn as lingerie and also as evening garments. They are used as push up bras or as a camisole for outer wear. That is what I use them for. Either over long sleeve tops with my short skirts and leggings or over tank tops with shorts. Guess I can thank Madonna for using underwear as outwear. I have two bustiers I am currently working on. Both from the thrift store. The solid pink one is finished. The solid pink bustier was a little too tight, bra cups TOO big and had a closure down the back. First I found a pair of stretch capris at the thrift store just the right color to use for inserts in the back to make bigger. Second I cut the front of the bustier down the middle and used the capri pants fabric to make a binding. Then I inserted a zipper so I could do a front closure. I made bra cup linings so I could insert bra cup fillers. Bummer, but what's a girl to do. I also added pink elastic straps. This is really pink.


The second bustier is the pink poka dot one. Wow, sometimes I wonder where these come from or who wore them. It is not finished yet. I have cut off the ribbons in the middle and I am going to put a zipper down the center like I did the pink one. The bra cups are WAY TOO BIG and I have to figure out exactly what I want to do. Either add inserts like the pink bustier or try somehow to remake the bra cups.

Tuesday, March 13, 2012

altered straw hats


Today I would like to address my love affair with hats. Now I know, I can hear everyone out in blog space saying Oh, I love hats, I just don't look good in them or I can't wear them. Hear is my response. One that I heard from someone I know who sold hats. He said everyone looks good in hats, you just need to find the style that works for you, and I couldn't agree more. Not only do you look fabulous in a hat, hats help keep the sun off of your face and neck, and hats also keep you cooler. Jay Leno was interviewing Taylor Swift a week or so ago and was discussing her cover on some top magazine and she was wearing a hat. Jay Leno said something to this effect, that more women would wear hats if they knew how good they looked in them. I totally agree. Both of these hats have been altered. The aqua hat was tan when I picked it up at the thrift store. I dyed it with Dylon dyes and it turned out this beautiful shade. After I dyed it, the straw had lost it's sizing and was limp. I put a coat of Stiffy on one side of the hat. It was enough to give it some stiffness, but not make it too stiff. I was able to shape the brim. I also added the poka dot band around the hat and put the same poka dot binding around the hat brim. I love doing that. It is fun and easy, and I think adds a special touch. The second hat is a purple hat that I got in LA at the Melrose Flea Market several years ago. It had a HUGE brim, and because of that I never wore it. When looking at it the other day, I decided I would cut off a big chunk of the brim ( about 5"). I then applied the binding ( couldn't find a poka dot fabric that would work ) around the brim. I glued a piece of felt on the hat band, so I can clip different flowers on the hat. It now looks great, and I will definitely we wearing it.

Tuesday, March 6, 2012

Altered dress


This week I would like to tell you about one of my favorite makeovers. I purchased this dress at the thrift store for about $5. It had big, poofy, 80's sleeves and had a cheap acetate, straight bottom type skirt, and a totally cute little peblem. Guess I should say I here and now I love peblums. I also loved the black, red and white floral, graphic top, and bought it knowing I wanted to use the top. Sometimes I buy something with no direct thought on what to do with it, but I knew right away what I wanted to do with this dress. First I washed the dress. Here is a cautionary tail. I like to be able to wash my garments, but sometimes washing the garment backfires on you. This dress did shrink, and I had to let out the seams in the bodice. Thankfully I was able to let it out enough for it to fit. So be careful when thinking of washing a garment which says dry clean only. You should be prepared for it to shrink. After I washed the garment, I cut off the bottom skirt. I also cut out the acetate lining in the top, which I then finished off with a purchased black bias tape. I also took out the zipper down the back of the dress, using the existing front closure to get in and out of the garment. I did leave the acetate lining in the peblum. I pair this top with either a short skirt with leggings or in our warmer weather, over a tank top and shorts. I really love wearing this.